Commands
Use commands to quickly insert predefined prompt fragments and streamline your workflow with Opulent
Commands are a Product target and the built-in set is still being finalized (Needs verification). The names, defaults, and management UI below describe the intended experience; the exact commands available in your workspace may differ. Check the command menu in your session for what is live today.
Overview
Commands are shortcuts that expand into predefined prompt fragments in Opulent's chat interface. They help you start common workflows — planning, review, QA runs, playbooks, handoffs, and session control — without typing full instructions each time.
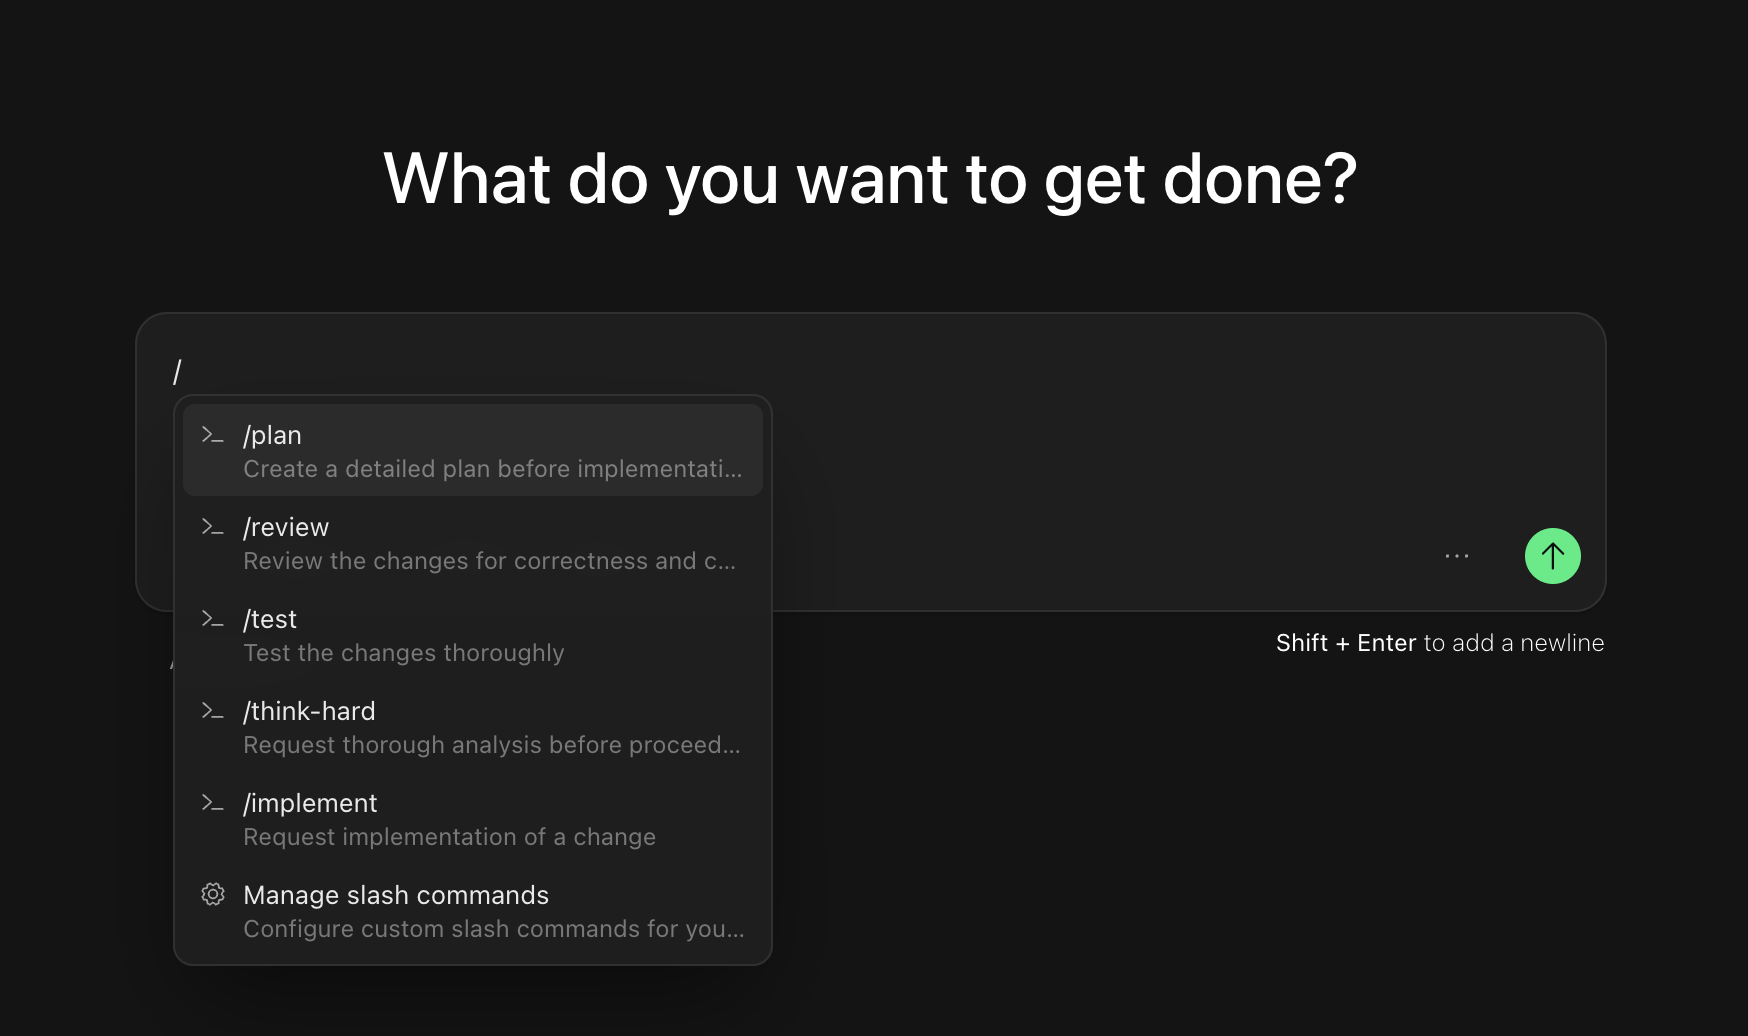
The interface includes visual badges and shortcut hints to make commands easier to discover.
Built-in Commands
Opulent ships with several built-in commands for common workflows. The set is being finalized, so treat the following as representative targets rather than a fixed list:
/plan
Have Opulent scope and plan a task before implementation. The planning fragment guides Opulent to analyze your workspace, identify relevant files, and propose a detailed approach.
/review
Set up a thorough review workflow where Opulent examines changes and gives feedback on quality, best practices, and potential issues.
/test
Have Opulent create tests, run existing suites, or analyze coverage for your workspace.
/qa
Kick off a QA run — Opulent exercises the change and captures QA evidence and recordings as proof of testing.
/playbook
Run one of your saved Playbooks — a reusable prompt pattern for repeated or team-wide sessions — into the current session.
/handoff
Compact the session's context into a clean summary at a milestone before continuing or delegating. A handoff is context compaction, not a transfer to a separate cloud session.
How Commands Work
When you start typing / in Opulent's chat input, a menu appears showing available commands. You can:
- Continue typing to filter the list of commands
- Use arrow keys to navigate through options
- Click on a command or press Enter to select it
Once selected, the command appears as a chip in the input field. An example for /plan will look like the below:
<span style={{backgroundColor: 'rgba(59, 130, 246, 0.2)', color: '#3b82f6', padding: '4px 8px', borderRadius: '6px', fontSize: '14px', fontFamily: 'monospace', display: 'inline-flex', alignItems: 'center', gap: '6px'}}>/plan <span style={{opacity: 0.7}}>×
Clicking on the chip expands it into the full prompt fragment, which you can customize before sending. Commands that control the session itself — pausing, resuming, or handing off — act on the current run when selected.
Custom Commands
Organizations can create custom commands tailored to their team's unique workflows. For example, you might create:
- A
/deploycommand with your team's deployment checklist - A
/security-reviewcommand with your organization's security review guidelines - An
/onboardcommand to help new members understand your workspace
Managing Custom Commands
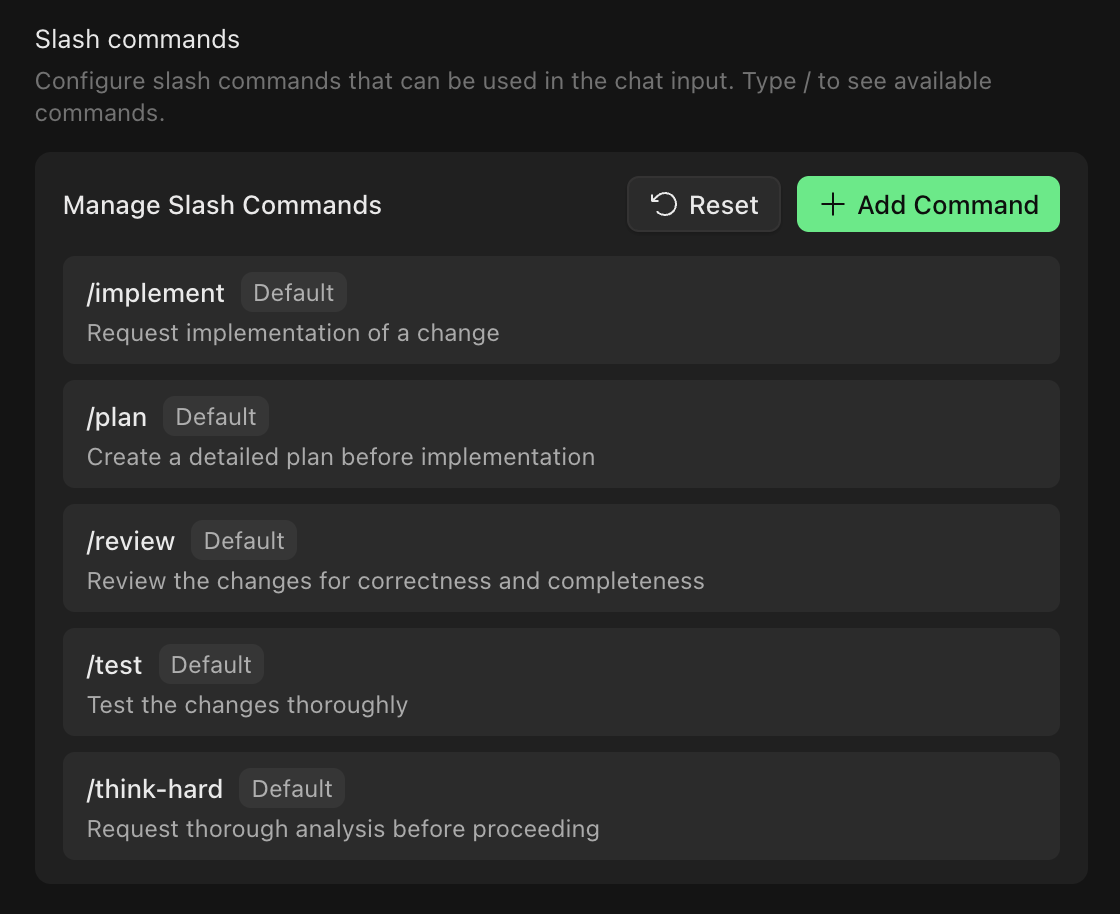
Organization administrators can manage commands through Settings > Customization. This interface lets you:
- View all available commands (both default and custom)
- Create new custom commands with specific prompt fragments
- Edit existing custom command fragments
- Delete custom commands
- Restore default commands to their original fragments
Creating, editing, and deleting commands requires organization admin permissions (ManageOrgSettings). All organization members can use both default and custom commands.